I have to say, Twinkies are the most time consuming, frustrating recipe I've ever done. And I'm not exaggerating when I say "ever'. Combine my entire infuriating 2 weeks of plated dessert in pastry school, with my 3 months of experimenting to fix continuously flat cookies,
and my first attempt at making Christmas dinner -
voila! You've got my entire night trying to make these Twinkies. I'll tell you the honest to god truth, the only thing my dust collecting Twinkies Bake Set was good for was the official pan to make the shape perfect. I guess I'll take the high heat spoon too :)

This challenge was daunting. It didn't start out that way, I mean come on. How hard could it be to make little cakes and fill them with some marshmallow-y frosting? Not hard, right? After several mishaps (that I will explain later), I have decided that Twinkies are my arch enemy of baking. I'll be trying it again just to say that I've mastered Twinkies. In the meantime, onto the baking! My bake set was supposed to come with a recipe book, but just my luck, I was cheated out of the official recipe - no recipe book to be found. So I set to work on finding a copycat recipe. The original copycat recipe called for a box of pound cake mix, and I thought that would be too dense, so I opted for a yellow cake mix to make it a little spongier. The creme recipe seemed okay, except for the fact that they wanted me to add some seriously salty water? I think not copy cat. So I took out the salt water and stuck with the other ingredients. All things considered, I think it turned out well for a first time Twinkies excursion.

First things first. Combine your yellow cake mix and your water. Make it into a batter like this. It will be very thick, but don't worry, this is going to be okay, I promise!
Next, take your egg whites and whip them to stiff peaks. Doing this in a stand mixer would be ideal so your whites have time to whip up and stay whipped and strong. Unfortunately I don't have a stand mixer, only my little hand mixer from the 80's (Old Faithful). Old Faithful only has 5 speeds which BEGIN at 90 mph. Needless to say it didn't take very long to whip my whites, but they were VERY unstable. If you have a stand mixer, take your time. Put it on 1 and when it starts to form some bubbles, turn it up every so slowly every couple of minutes to ensure that your whites are getting enough air in a reasonable amount of time so that they stay strong.
Put your egg whites into your batter one spoonful at a time. Mix each spoonful about 80% of the way before you add the next spoonful. Be careful to only mix to 80% before the next spoonful, you don't want to overmix and run the risk of deflating all of your egg whites. Once you have the last spoonful in, mix it all the way.

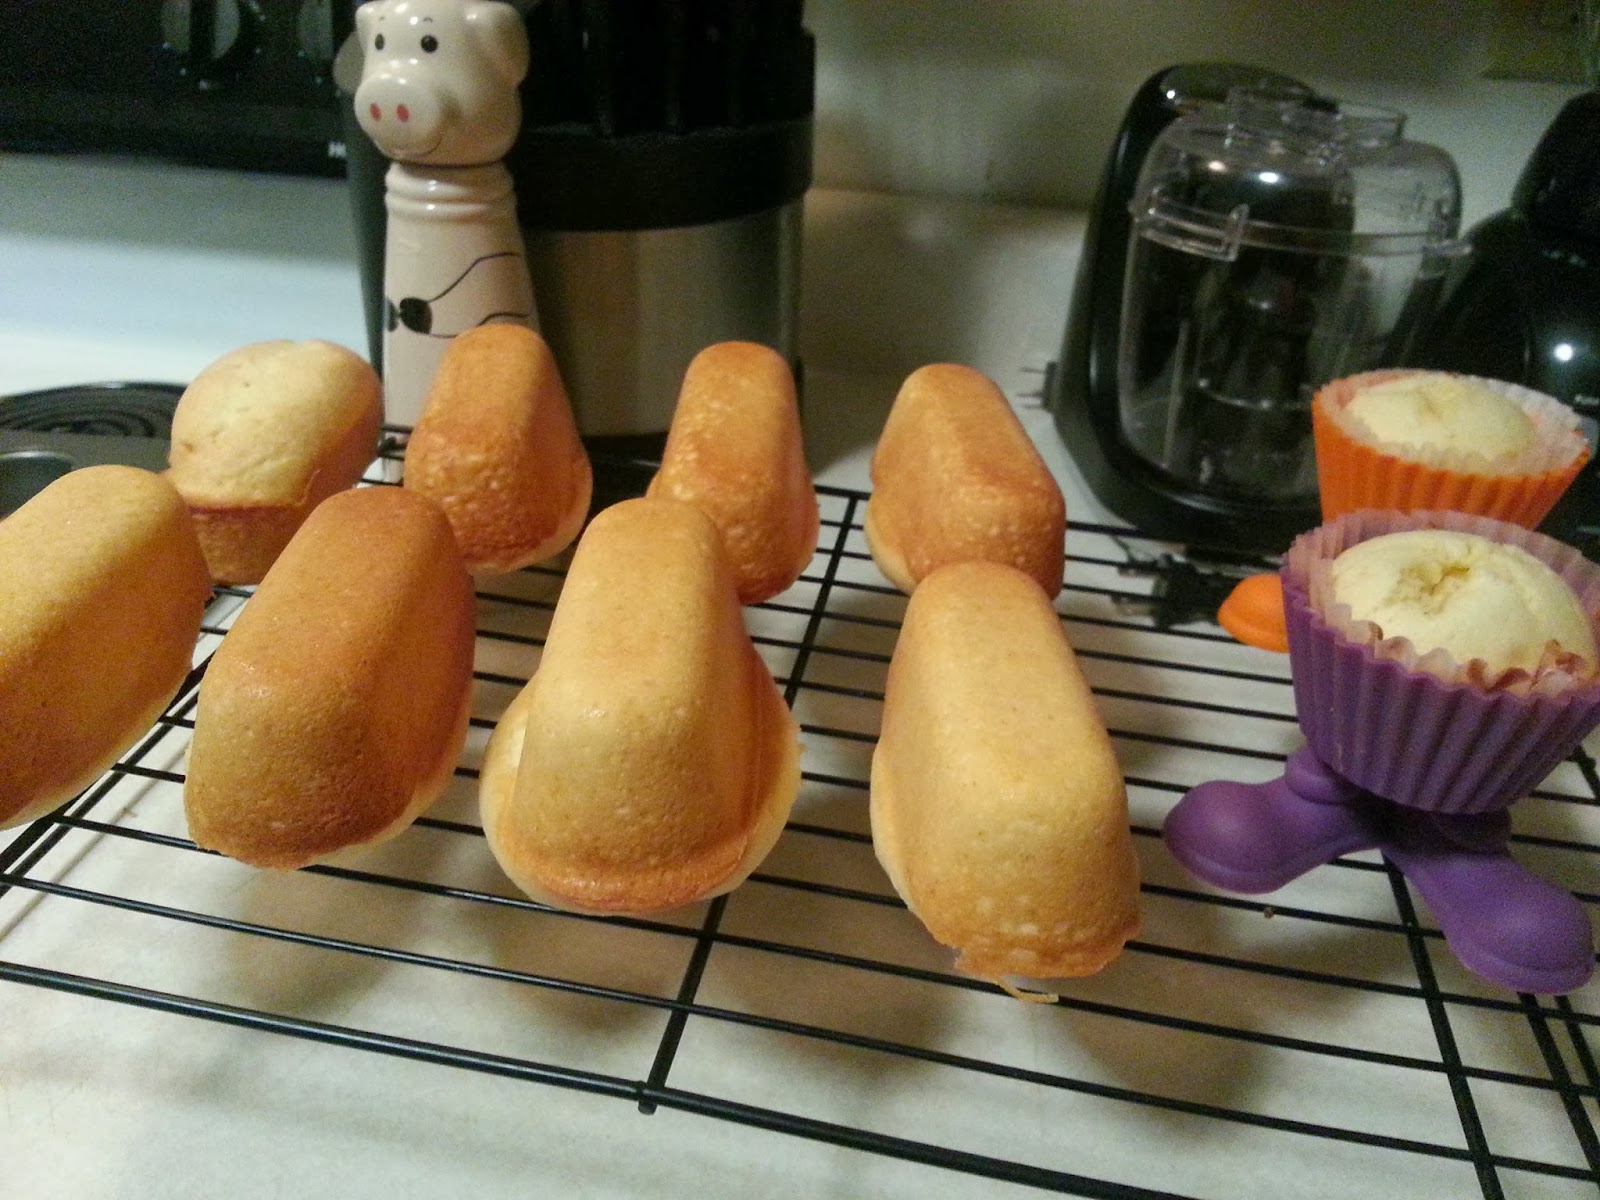
Pour your batter into the mini loaf pans, and if you have left overs, into cupcake molds. (How cute are my little feet holders???) Pop those into a 325F oven for 30 minutes. In the meantime, onto the creme filling. I didn't take any pictures of this because it's super simple. Just mix everything into your bowl and beat it with a mixer until it's smooth. Now if you're like me and somehow have a Twinkies Bake Set, DO NOT use the icing syringe! I got through 3 Twinkies before the plunger on the inside of the tube had totally turned sideways rendering it completely useless. However, it decided to be useless AFTER it had exploded all over my hands and favorite shirt :( After the explosive incident, I opted for the plan I should have followed first. I grabbed a piping bag, my smallest tip, and just went to town.

When your Twinkies come out of the oven, let them cool in the pan for a few minutes before turning them upside down on a wire rack to cool the rest of the way. After they've cooled, take a very large knife, a cutting board and each Twinkie. Carefully cut off their overhang (I like to call them their love handles and butts :) ).
After you've taken your knife to them, they'll look like perfect twinkies, and you'll have lady-finger like extras that are great for strawberry shortcake parfaits (I might try those later ;) ).
This creme is so delicious, can I just inject it into my bloodstream? Just kidding, that would be gross.
But seriously, just do yourself a favor, use a piping bag and tip. If you don't have any of those things, take a gallon size ziploc bag, fill it with the creme , then snip off the very tip and use that as a piping tip. If you're using this method though, you'll have to poke your own holes in the tummies of the Twinkies. Take the butt of a wooden spoon, or even a knife, and hollow out 3 little holes in the twinkies about 1 in apart. Make sure you poke the holes deep enough to let the creme sink in all the way, but not too deep where you poke through the top of the Twinkie. I had a bunch of leftover creme..
So I decorated! Yay :)
I filled these little guys with the creme and topped them with more. How cute! Sorry for the fuzzy quality of the camera, I accidentally had a film of sugar on lens...
I hope you guys enjoy these, and if you have any questions, I'm always open to answer! If you don't have mini loaf pans and still want to make the Twinkie shape, I have instructions to make some homemade molds after the recipe. Enjoy!
Calorie Count: 364 calories per cake
1 box yellow cake mix
4 egg whites
2/3 cup water
2 cups marshmallow creme
1/2 cup shortening
1/3 cup powdered sugar
1/2 tsp vanilla
WITH TWINKIE SET
For the cake
1.) Oven to 325F
2.) Beat egg whites until stiff peaks form. In separate bowl, mix cake mix and water. Once egg whites have formed stiff peaks, gently fold them into the cake batter, combine thoroughly.
3.) Fill twinkie molds, bake for 30 minutes, or until golden brown and baked all the way through
For the filling
1.) Combine marshmallow creme, shortening, powdered sugar, and vanilla with a mixer until fluffy. If you want to flavor your creme, add the flavoring and the color at this point.
2.) Once the cakes are cooled, inject the creme into the twinkie in 3 different areas. Enjoy!
WITHOUT TWINKIE SET
For the cake
If you have mini loaf pans, follow the instructions for the cake to a tee. you will not get quite the same shape, but it will work just the same.
For the filling
Once your cake is cooled, take a wooden skewer, or the butt of a wooden spoon, and poke 3 deep holes in the bottoms of the cakes. Move the skewer or spoon in a circular motion to create a cavity. Make sure you poke deep enough to create a space for the filling, but not too deep where you poke through the top of the Twinkie. Fill a ziploc bag with the creme filling. Snip off a very small corner of the bag, insert into each hole and press the bag to push the filling into the twinkie. Enjoy!
For makeshift molds:
1.) Take a 6" piece of aluminum foil, and fold it in half.
2.) Take a medium sized spice bottle and form the foil around the bottle, closing the edges up around the top and bottom of the bottle to make an enclosed shape.
3.) Make sure that if there are gaps where your top and bottom close, tape them shut or place more foil around the edges to make one full shape. Make 10 for 1 batch. Enjoy!


No comments:
Post a Comment